Let’s build an AI Content Generator somewhat like chatgpt.
Step 1 : Setup React Project
Ohh please! Do it by yourself now 😉
Step 2 :Setting up Gemini API
Now their are many api’s in the market like open api , gemini api , bard api , claude api, etc. The aim of this tutorial is to make you understand how we can use an AI api and get some result out of it.
Here I have use Gemini API (free one).
First question , is it paid or free ?
It is free till certain rate limits, post that it’ll start charging. Check pricing for peace of mind : https://ai.google.dev/pricing
Why not use chatgpt api ?
I would love to but its not free.

Ok , let’s get back to the topic.
Setup gemini here : https://ai.google.dev/tutorials/setup
Also check different gemini models – https://ai.google.dev/gemini-api/docs/models/gemini
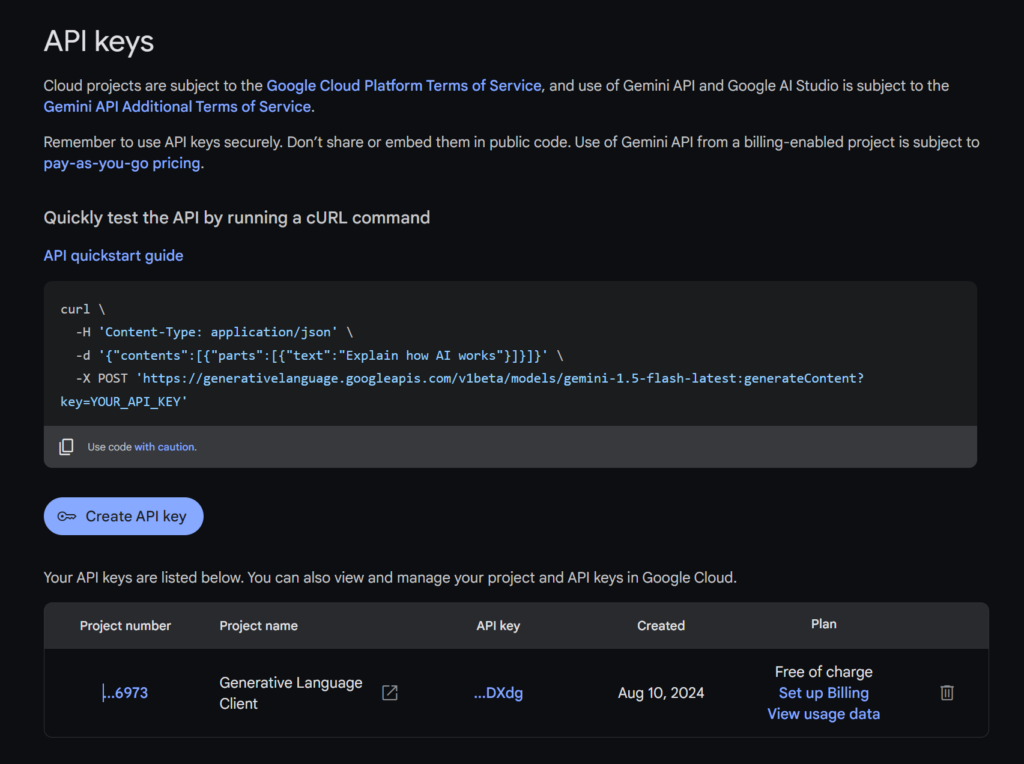
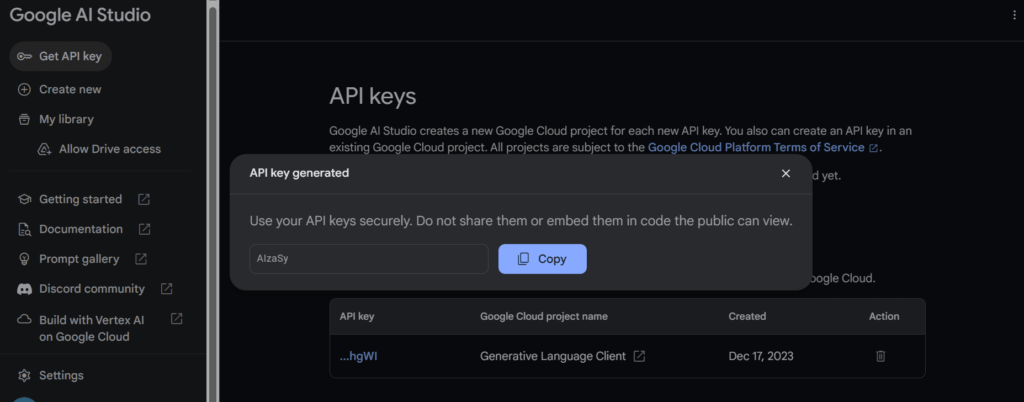
Here you have to get the API key

Click on create API key button and generate a new API key (Never share you api key)

Step 3 : Adding Gemini API key in our frontend project
Create a .env file and add the API key into .env file
.env
VITE_GEMINIAI_KEY = XXXXXXXXXXXXXXXXXXXXXXXXXXXutils/constant.ts
Here , I have added the API key into my constant file to maintain consistency
// GEMINI API KEY
export const GEMINIAI_KEY = import.meta.env.VITE_GEMINIAI_KEY;
Now let’s initiate our API
Install this package
npm install @google/generative-aiHere we are initiating the gemini model.
utils/openai.ts
import { GoogleGenerativeAI } from "@google/generative-ai";
import { GEMINIAI_KEY } from "./constants";


// const client = new OpenAI({
//   apiKey: OPENAPI_KEY, // This is the default and can be omitted
//   dangerouslyAllowBrowser: true,
// });

// Access your API key as an environment variable (see "Set up your API key" above)
const genAI = new GoogleGenerativeAI(GEMINIAI_KEY);
const openai = genAI.getGenerativeModel({ model: "gemini-1.5-flash" });

export default openai;
[!CAUTION] Using the Google AI SDK for JavaScript directly from a client-side app is recommended for prototyping only
Step 4 : Now let’s build the component
Here I am using bootstrap cdn for styling :
<link href="https://cdn.jsdelivr.net/npm/bootstrap@5.0.2/dist/css/bootstrap.min.css" rel="stylesheet" integrity="sha384-EVSTQN3/azprG1Anm3QDgpJLIm9Nao0Yz1ztcQTwFspd3yD65VohhpuuCOmLASjC" crossorigin="anonymous">Let’s create a jsx component
Install markdown
npm i react-markdownAISearch.jsx
import React, { useRef, useState } from "react";
import openai from "../utils/openai";
import ReactMarkDown from "react-markdown";

const AISearch = () => {
  const searchText = useRef();
  const [searchResult, setSearchResult] = useState("");
  const [error, setError] = useState(null);
  const [loading, setLoading] = useState(false);
  const handleAISearch = async () => {
    const prompt = `Act an an AI recommendation system and give me relevant output based on ${searchText.current.value}`;
    try {
      setLoading(true);
      setError(null);
      const gptResult = await openai.generateContent(prompt);
      const response = gptResult.response;
      const text = response.text();
      if (!text) {
        setLoading(false);
        return;
      }
      setSearchResult(text);
    } catch (error) {
      console.log(error);
      setError(error);
    } finally {
      setLoading(false);
    }
  };

  if (error) {
    return <h2>{error}</h2>;
  }

  return (
    <div className="container-fluid py-5 w-75">
      <h2 className="text-center">AI Search</h2>
      <div className="d-flex justify-content-around mx-auto">
        <input
          type="text"
          className="form-control"
          placeholder="search your movie"
          ref={searchText}
        />
        <button className="btn btn-info text-nowrap " onClick={handleAISearch}>
          Search Movie
        </button>
      </div>
      {loading ? (
        <h3>Loading...</h3>
      ) : (
        searchResult && (
          <div className="border border-1 border-secondary rounded my-2 p-4">
            <ReactMarkDown>{searchResult}</ReactMarkDown>
          </div>
        )
      )}
    </div>
  );
};

export default AISearch;
Conclusion
This application is for practise sake and make you familier how we can use open source AI api and build a content generator of our own.
Still the ideal way is to use the api in the backend side and not on the frontend side. Do keep this in mind.
Thanks for reading.
Happy Learning!